In today’s digital world, whatever work you are doing, it is very important to take the help of social media to promote that work. And Facebook is a very good medium for that. For that, you need to create a Facebook page. You can build a community with the help of Facebook page. Whether you are an artist, or a business owner, or working on something special, Facebook page is a helpful tool to complete your goals. So today we will tell you in simple language how to create a Facebook page and how to optimize it.
Why You Should Create a Facebook Page?
With the help of Facebook page, many of your tasks become easy such as:
- Opportunity to reach an unlimited audience.
- Easy way to share promotions, events and events.
- Opportunity to drive traffic to your website.
- Creating brand identity and building trust among people.
- Chance to engage with followers and gather insights.
Step 1: Getting Started with Your Facebook Page
- Log into Facebook: Access Facebook from your personal account. Don’t worry, your personal information will not be made public through the page.
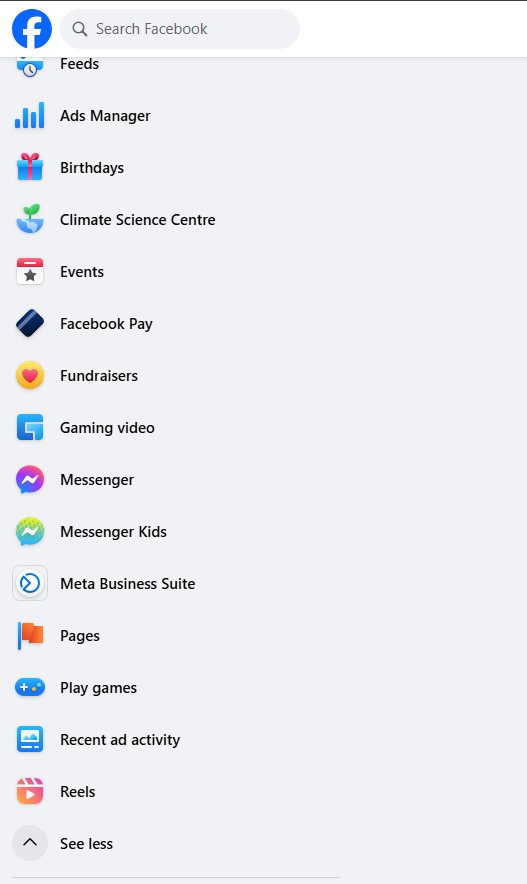
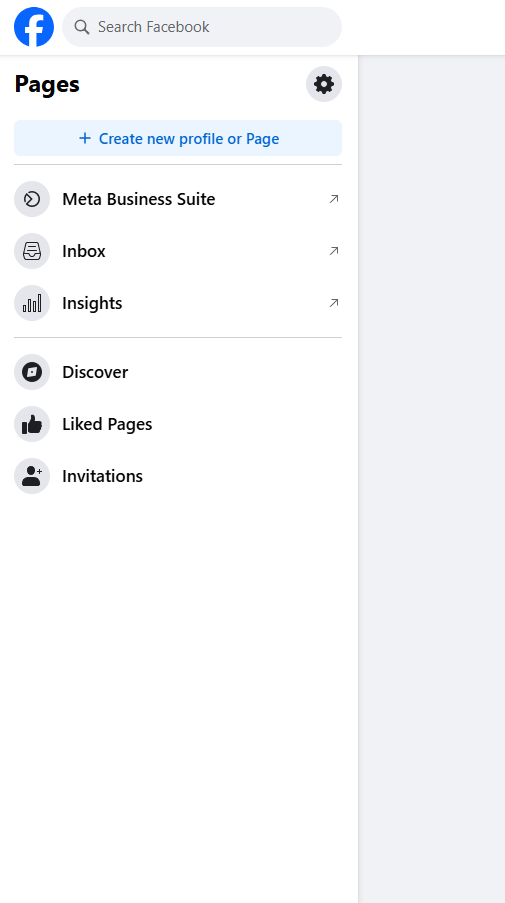
- Go to the Pages Section: If you are on a computer, go to the Pages option in the left-hand menu. If you are on mobile, tap on the three line menu and select Pages from there.
- Click on “Create New Page”: Facebook will help you set up the page with prompts.
- Choose The Page Type: Select the Page category, such as whether your Page will represent a business, brand, community, or public figure. This option will help tailor your Page settings to your specific needs.


Stap 2: Set The Basic Settings
- Page Name: Choose a unique and memorable name for your Page that clearly represents your brand or work.
- Category: Facebook will ask you to choose a category for your Page that best describes your Page. You type the keywords related to your page like if your page is for restaurant or consulting, and choose the most similar option.
- Description: Write a short and attractive description of your page. Such as what you will provide to followers such as services, content, or updates.
Pro Tip: Keep the description friendly and informative so that new visitors can easily understand the purpose of the page.
Stap 3: Add Profile And Cover Photos
- Profile Picture: Choose a high-quality image, ideally a logo or headshot if it’s your personal brand. This is the photo that will be visible to everyone with all of your posts and comments.
- Cover Photo: The cover photo is the banner image that appears at the top of your page. It should be relevant to your work or service. You can design a cover photo with the help of a tool like Canva.
Step 4: Optimize Your Facebook Page
- Add a Username: People will be able to easily search for your page by typing their username or @handle. Make sure to choose a username that matches your brand name or is memorable.
- Edit Your Page Info: Go to the “Edit Page Info” section and add more details, such as:
- Contact Info: Add your phone number, email, and website.
- Location: If you have a physical location, then definitely enter that address, it will be easier for customers to find you.
- Business Hours: Set the operating hours if you’re a business.
- Call-to-Action (CTA) Button: Add a CTA Button, like “Shop Now,” “Contact Us,” or “Sign Up,” Which is according to your goals. This feature will make it easier for followers to take action
Step 5: Creating Content for Your Facebook Page
Now that your page is live, it’s time to start sharing content to engage your audience.
- Post Regularly: Consistent posting keeps your audience engaged. Aim for at least 2–3 posts per week to stay visible.
- Mix Up Content Types: Share different types of posts, including:
- Text Updates: Share quick updates, tips, or news.
- Photos and Videos: Visual content often attracts more engagement.
- Links: Share links to blog posts, articles, or your website.
- Events: Use the “Events” feature to invite people to upcoming events.
Tip: Use Facebook Insights to analyze which types of posts get the most engagement.
Step 6: Promoting Your Facebook Page
- Invite Friends: Start by inviting your personal friends to like the page. Facebook makes this easy with an “Invite Friends” option.
- Share Your Page Link: Promote your page link across your social media channels, website, and even email signatures.
- Collaborate with Others: Partner with similar pages, influencers, or businesses to broaden your reach. Tagging others in posts or organizing joint events can increase visibility.
- Use Facebook Ads: If you have a budget, consider running Facebook ads. This tool can target specific demographics, locations, and interests to help grow your page faster.
Step 7: Engage with Your Audience
- Respond to Comments and Messages: Engaging with followers builds community and makes them feel valued.
- Host Live Videos: Facebook Live is a fantastic way to connect directly with your audience. Use it for Q&A sessions, product demos, or just casual interactions.
- Join Groups: Facebook Groups related to your industry or interest can be a great place to connect with potential followers.
Step 8: Monitor Your Page’s Performance
Using Facebook Insights, you can track your page’s performance. Pay attention to metrics like:
- Reach: How many people saw your posts.
- Follower Growth: The number of new followers over time.
- Engagement: Likes, shares, and comments on your posts.
By analyzing these metrics, you’ll gain insights into what your audience likes, allowing you to refine your content strategy for maximum impact.
Creating a Facebook page doesn’t have to be complicated. With a clear goal and consistent engagement, your page can become a valuable asset for your brand. Start building your page today and connect with an audience ready to support your journey!
Your blog is a breath of fresh air in the often stagnant world of online content. Your thoughtful analysis and insightful commentary never fail to leave a lasting impression. Thank you for sharing your wisdom with us.
Your passion for your subject matter shines through in every post. It’s clear that you genuinely care about sharing knowledge and making a positive impact on your readers. Kudos to you!